
Print Menu - Menu Builder *Recommended*
- Do you have questions about your print or maybe just need a little help getting your print menu dialed in. Join one of our weekly print training webinars here and learn more about this tool.
- Are you on the fence out trying the TapHunter print tools? No worries, Click Here to start a free trial and give the tools a go on us.
Getting Started
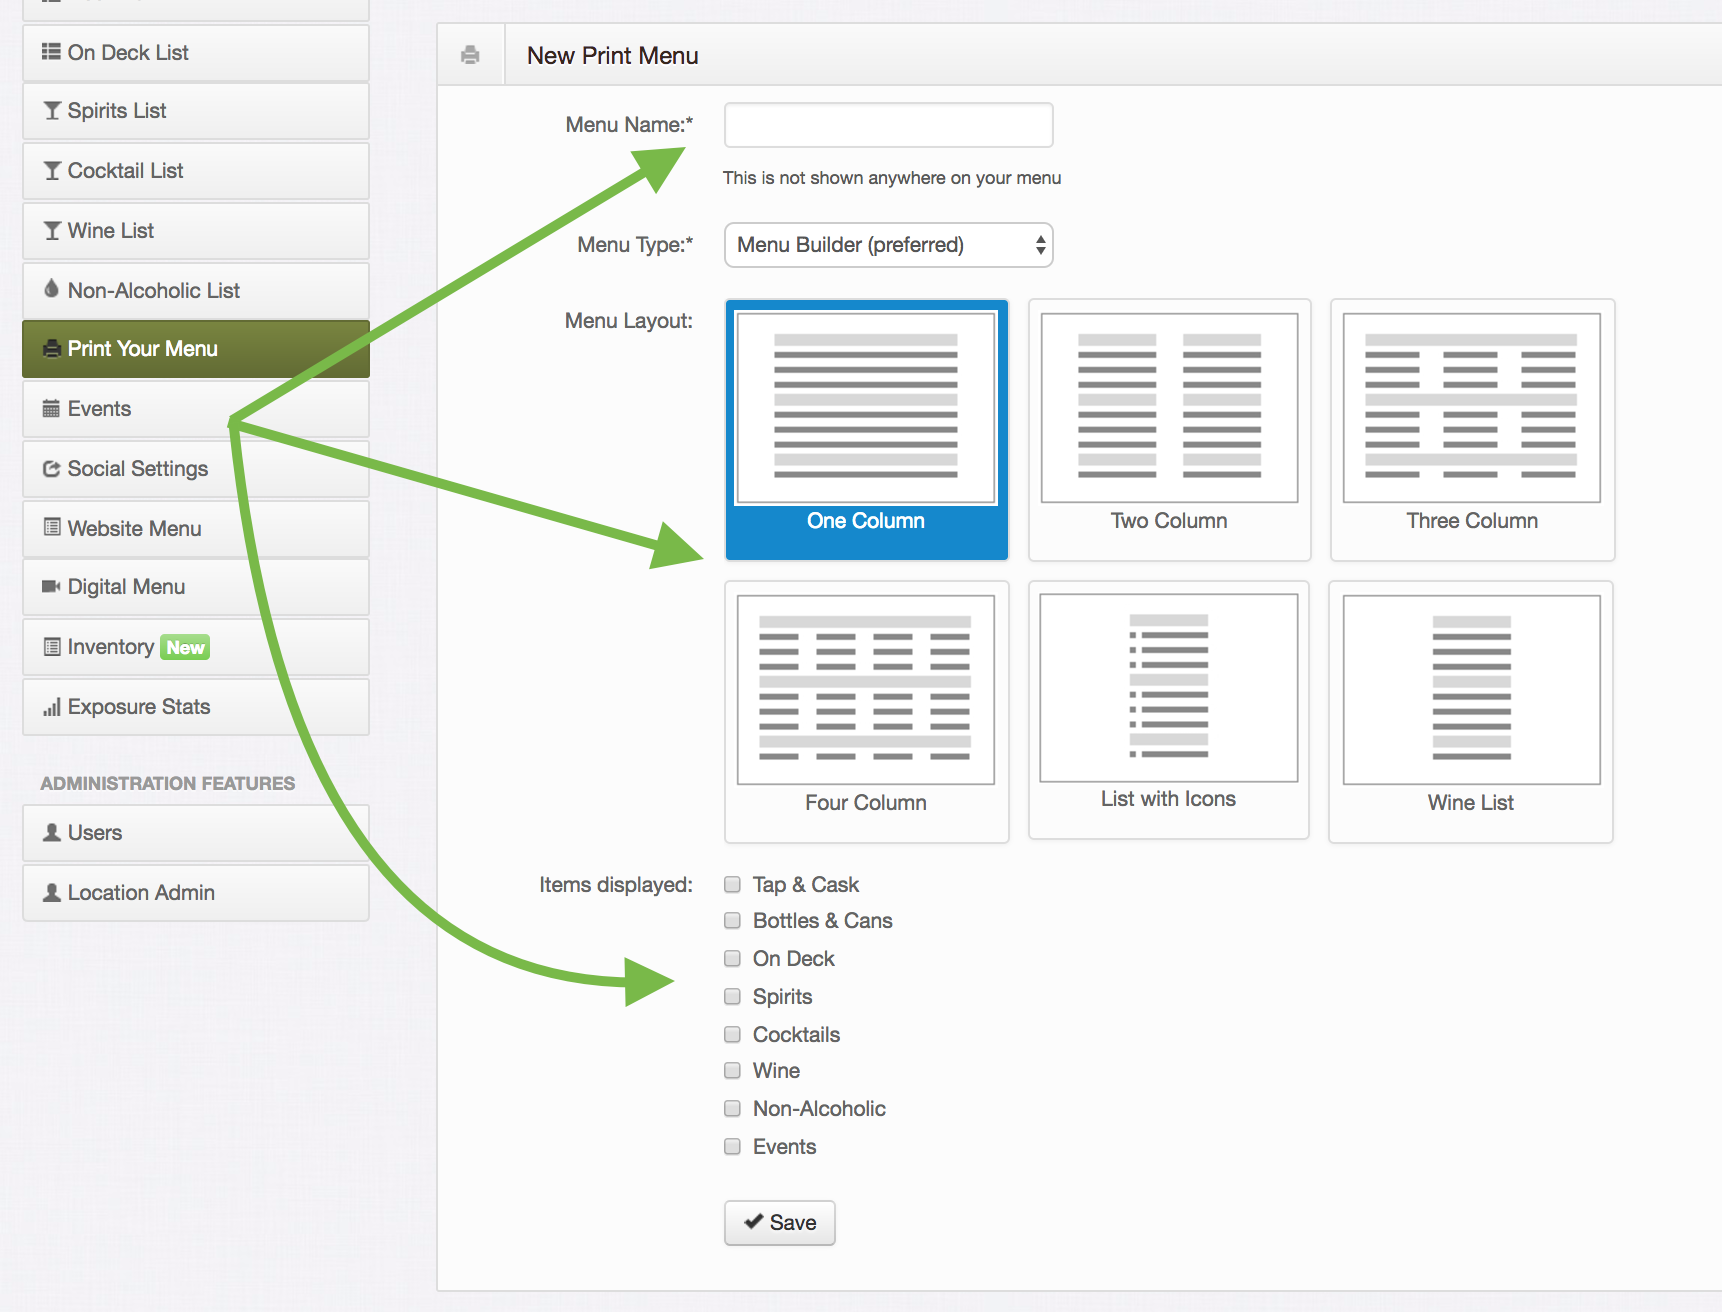
If you would like to print more than one beverage list (beer, spirits, cocktails, wine, and N/A) on the same menu, you can build your own combined menu using the new menu builder tool. To get started, click the "+New Print Menu" button and select "Menu Builder" from the dropdown.

Choosing What to Print
- First, name the new menu, select the layout you'd like and then choose the beverages or info that you'd like included in your new menu.
- To add a new menu section/layer (addition beverages, print date, "follow us on TapHunter", spacers, images), click the "+New menu section" button in the top left corner of the section. Sections include an image, print date, QR code, etc.

- Edit the information you'd like to show by clicking "Edit" under the Actions column.
- Use the arrows to arrange the sections in the order you'd like to see on your print menu.

- Click " Save Configuration" to save this order and settings.
Adjusting Fonts & Spacing
As you scroll down, you can change the # of columns and select what size paper you're using in the "menu settings" section.

At the bottom of the page, you can adjust the sizes, fonts, spacing, font colors and watermark. To finish up and see a preview of your menu, Click " save and print" and TapHunter will generate a PDF menu that you can print right from your office printer.

Join our weekly training webinar to learn how to best use this tool.


